
This Page discusses the Development of the Váli's weapons, The Blades Of Carnage. This section will go over how I:
- Modelled in Maya
- Sculpted and refine in Zbrush
- Retopo in Zbrush with Zremesh
- Surface Detail and PolyPaint
- Secondary Texturing in Substance Painter
- Rendering in Arnold
Modelling in Maya
 Blades Of Chaos
The plan was to model one blade and adjust the textures in Substance to add variety to the colours and roughness. Modelling was done in Maya, using a cube and a cylinder primitive.
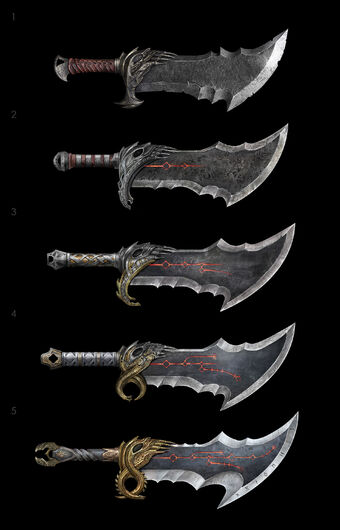
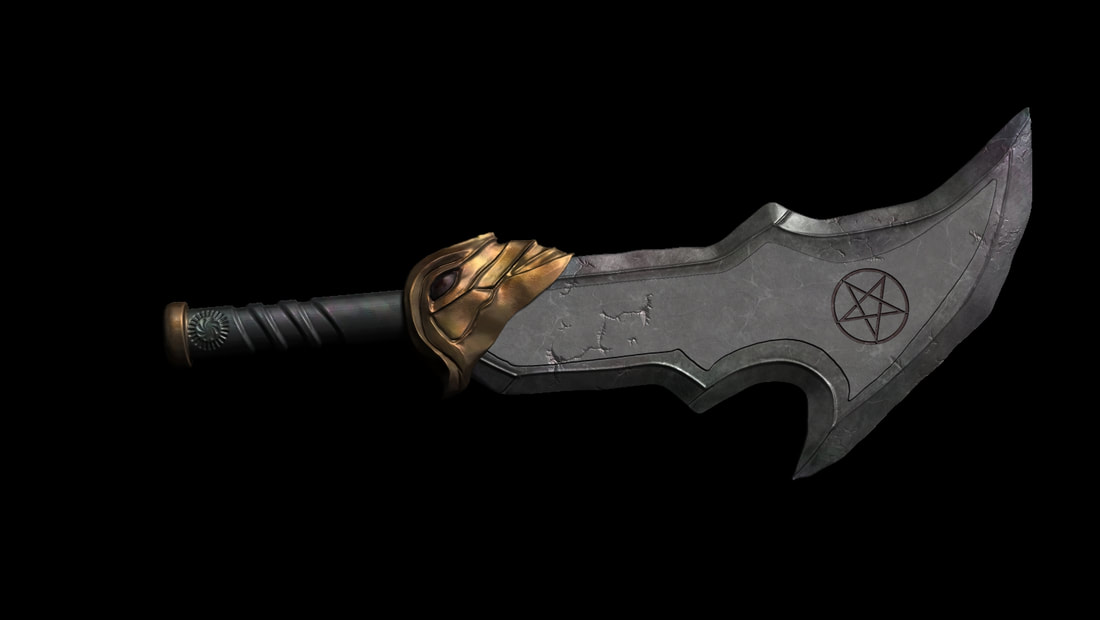
I was inspired by the Blades Of Chaos from God of War. I found this reference on the Gnomon workshop by Raf Grassetti and Dela Longfish. These weapons were in all God Of War titles. As you progress on the latest title, he goes back home to retrieve the blades of chaos to fight the guardian of the bridge of the damned in Helheim. They were worn down and looked old. I liked that design and I wanted to incorporate that in my weapons. The shape of the blade is pretty similar to the ones in God Of War. I wanted to add some things that relate to Váli's past life so I put the symbol of Lucifer to the front of the blades, like a rune that can hold magic power and transfer to the blades during combat, hence the red emission coming from the symbol.
I was inspired by the Blades Of Chaos from God of War. I found this reference on the Gnomon workshop by Raf Grassetti and Dela Longfish. These weapons were in all God Of War titles. As you progress on the latest title, he goes back home to retrieve the blades of chaos to fight the guardian of the bridge of the damned in Helheim. They were worn down and looked old. I liked that design and I wanted to incorporate that in my weapons. The shape of the blade is pretty similar to the ones in God Of War. I wanted to add some things that relate to Váli's past life so I put the symbol of Lucifer to the front of the blades, like a rune that can hold magic power and transfer to the blades during combat, hence the red emission coming from the symbol.
So onto the modelling, I imported the reference as an image plane and scaled it to the desired size of the blade. Once I was happy with that, I placed a cube and a cylinder primitive onto the scene and moved them where I needed it. The cylinder was scaled to the handle size. The cube was in the centre of the blade, ready to start poly modelling.
Poly Modelling is crucial when making something in 3D and has to be done methodically. Edge loops are part of modelling because they hold the model together and retains the shapes. If they are misplaced, the model will be difficult to fix after the fact. I use the move tool and extrude to build the shape of the blade. I put faces where it's needed. The edge loops are placed along the blade edge and flat sides to give me a solid outline of the blade.
Here is the blade once poly modelling is done:
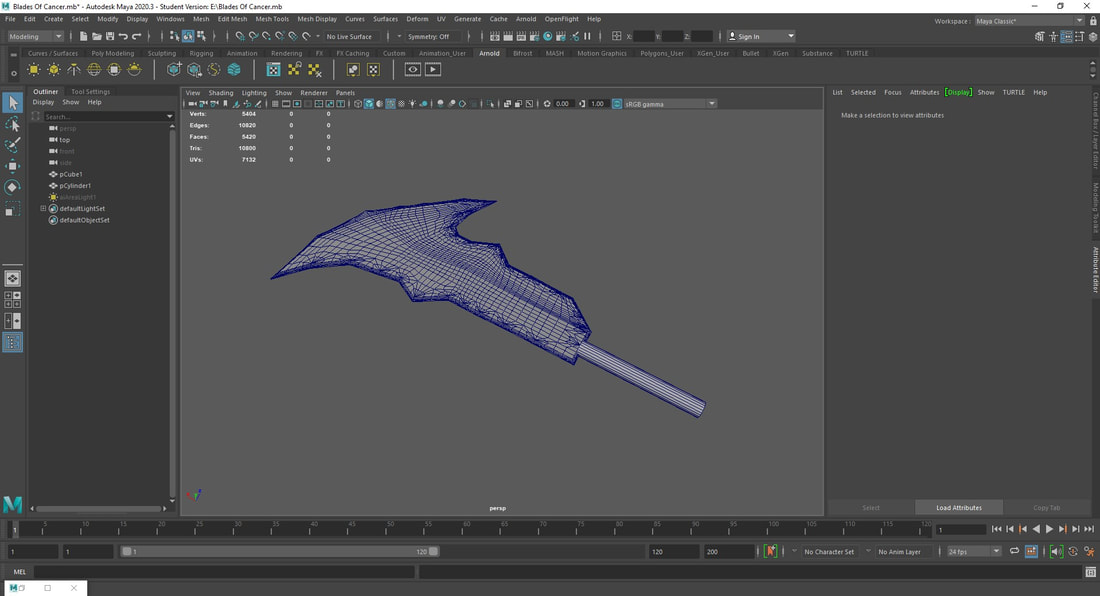
In terms of topology, it was all over the place and didn't look clean at all. I wasn't worried because I could fix it in Zbrush and I was going to retopo with Zremesher anyway.
In hindsight, I could've cleaned up the topology so when detailing, I could use it to help create sharper edges.
In hindsight, I could've cleaned up the topology so when detailing, I could use it to help create sharper edges.
Sculpting in Zbrush
I exported the model as an FBX from Maya to Zbrush and used Zremesh to get cleaner topology for sculpting. Without clean topology, any hard surface details I add won't be clean which meant I would have to do more cleanup later so doing it first is best.
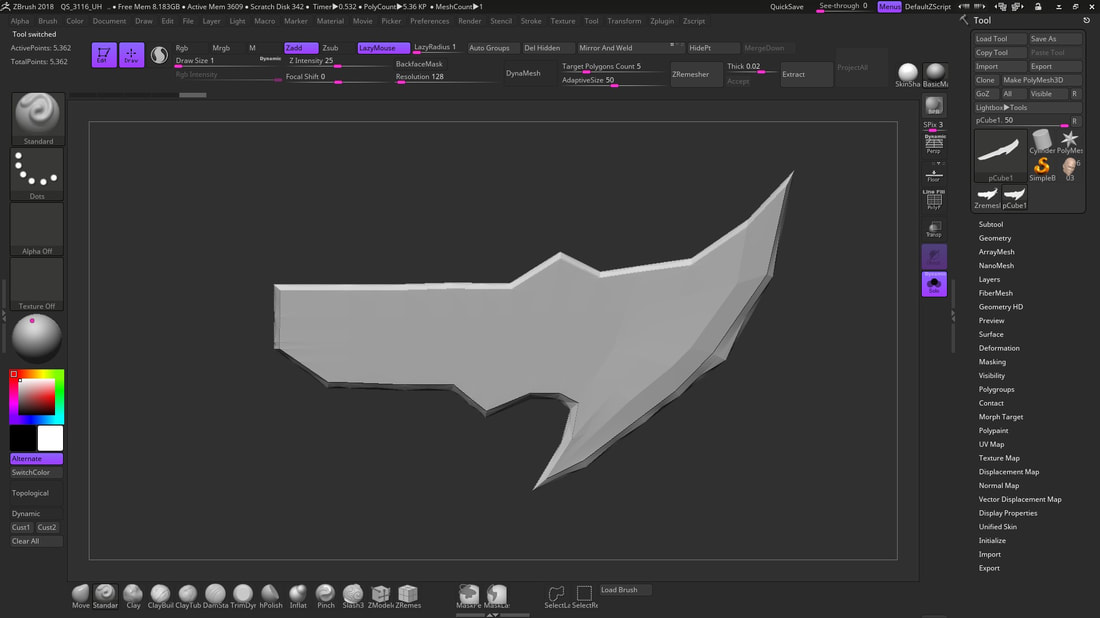
I start to build primary shapes using the reference as inspiration, so I mask the flat sides to create the bevel to separate it from the blade edge. I inflate and polish hard edges to create a plane to it. I trim dynamic and H polish brushes to build the blade edge. I'm not worried about any small details yet. I am only focusing on the big shapes and build a base for those details to go on.
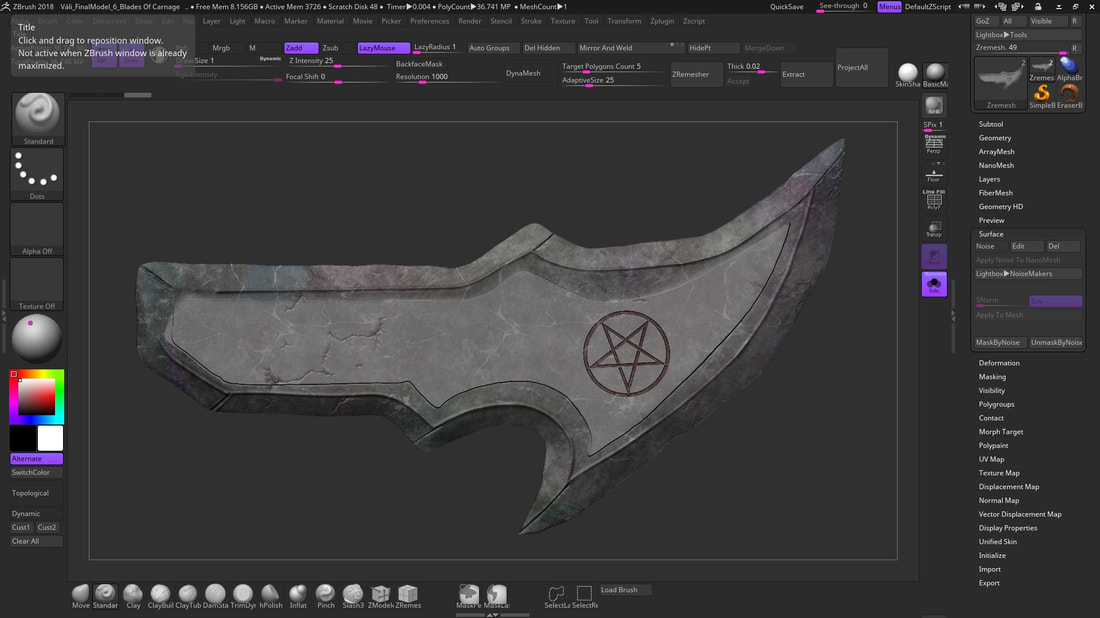
Now I start adding secondary details. I used dam standard to cut the curved edges of the blade. I clean up some of the bade edge using H Polish. Once I was happy with the secondary details, I was able to think out the tertiary details like the cracks and any symbols.
I use the Slash and dam standard brushes to create cracks and other details to the blade. I was thinking of some Norse designs to add but didn't like how it looked. So I scrapped that idea and proceeded to use symbols from Váli's past. I had to do a lot of cleanup to the blade because there were some gaps between the edges. I used the Pinch brush to bring the blade edge closer together.
I liked the design of the blade and was happy to start building the handle. Once the blade was done, I could polypaint to give it some colour using Color spray with a big brush.
Handle
The handle's design was simple. All I had to do was mask three diagonal loops at the end of the handle to inflate using deformation. I subdivided the cylinder to give me more topology to use. After that, I quickly use polypaint to give me an idea of what it would look like with textures. I was planning to finish the blade like this, but it looked too bland. It didn't look very intimidating, so I designed a guard with a jewel inside it as if it was an eye.
Guard
I inserted a sphere and used Dynamesh to sculpt the basic shape I wanted for the guard. I wanted the guard to look like some a creature. I didn't know what type but I was going along with some ideas I had. I used Several Brushes to add volume and detail to the guard. I had to Zremesh so I can get clean cuts when using Dam Standard. Using the move brush, I shaped the sphere to the shape of the guard. I use Colour Spray to polypaint the guard and assign the "Textured Metal" material to the entire blade.
I did a quick BPR render in Zbrush, I set my BPR shadow rays to 80 and angle to 40, so I don't get any harsh shadows. I love the design. I hadn't poly modelled for a while, so having the chance to do it again it was really exciting. The last time I made a weapon was 5-6 months ago. It was the Legend Of Zelda Master Sword which I was happy with. I was anxious to do poly modelling again, but I had to do it or I wouldn't get a nice base mesh to use as the blade.
BPR render in Zbrush
Zbrush - Substance Painter
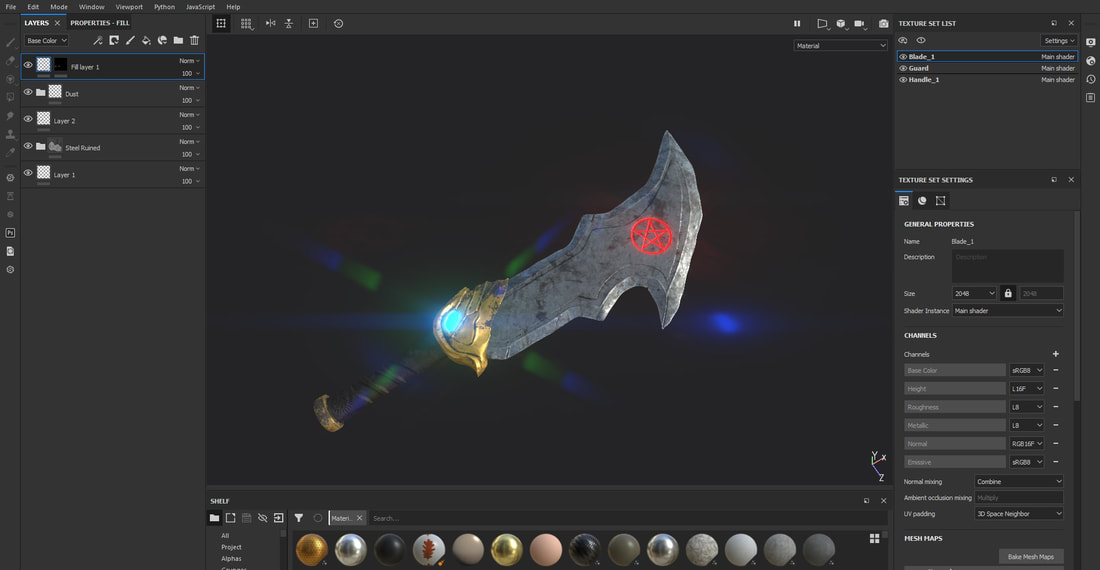
I used UV master to unwrap the models and used FBX export import to export the low and high poly models so I can bake in substance. I use the same settings for baking from Váli, but the only thing different is I exported I high poly version that was used to project the details. Once Baking was complete, I used gold and iron smart materials for each of the textures sets and adjusted them to my preferences. I added an emission map to the gem and the Satan Symbol to give it more of a magical vibe. In order for me to see the emission in Substance I went into preview setting and adjusted the emissive intensity and enabled glare in the post effect dropdown menu.
Test Renders in Maya
I used a Light Studio Maya Scene made by FlippedNormals to get renders of what the blades look like with all textures.
Here are the results:
Here are the results:
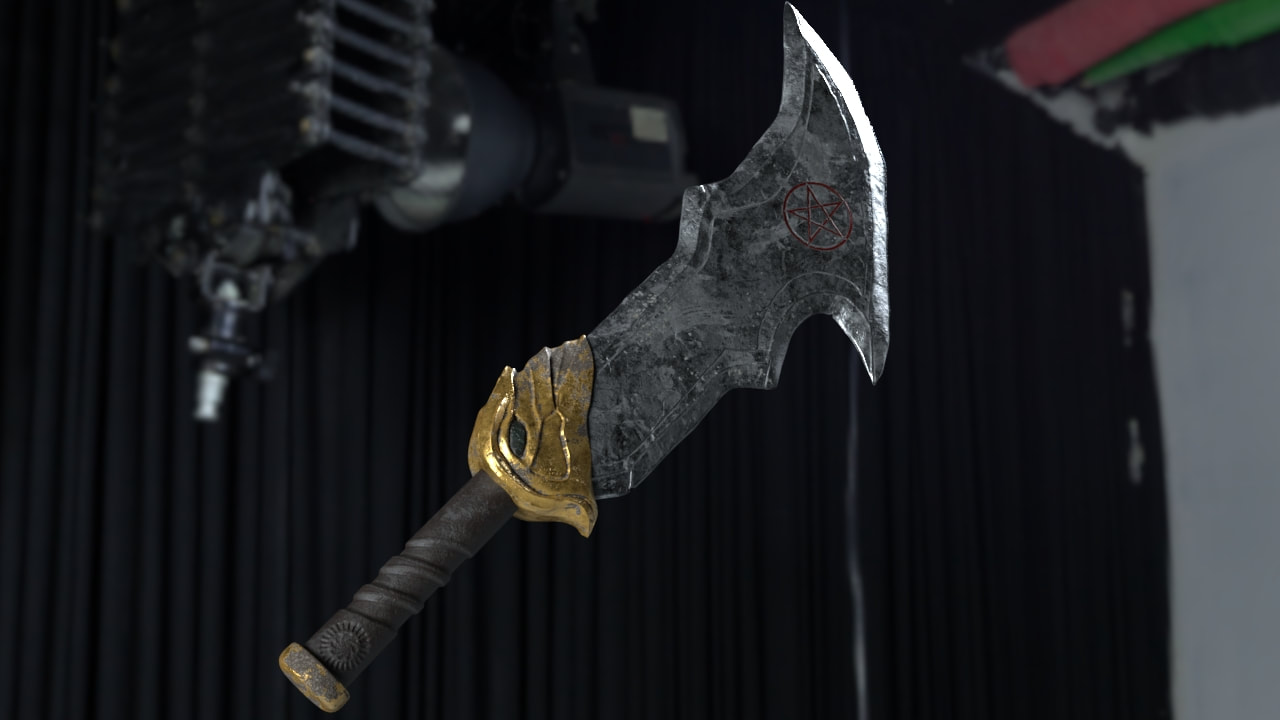
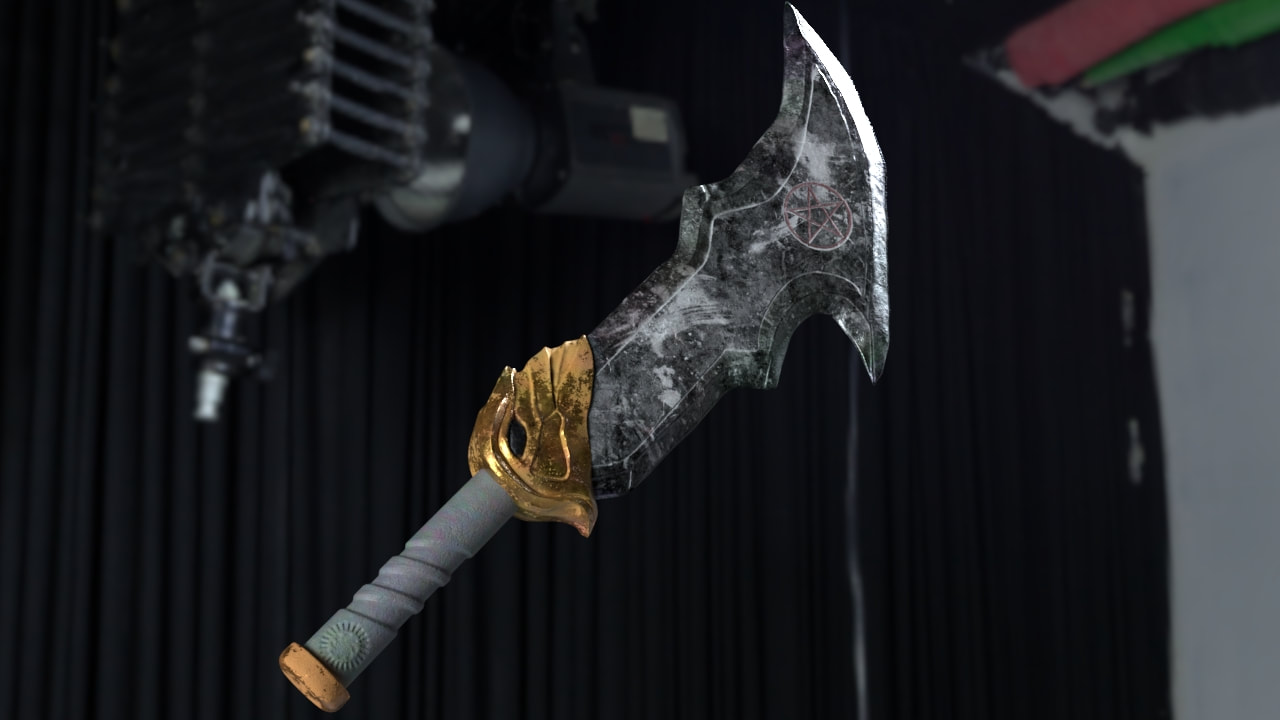
I loved how these renders turned out. for these renders I used a HDR from HDRI Haven where you can get high quality HDRI's for any environment. I liked both of these textures. But I like the polypaint textures for the blade and guard because it looks more colourful. The handle wasn't appealing so I combined the polypaint and the substance base colour maps. The handle's base colour was from Substance and everything else had Polypaint Colour maps. After setting up the Lightroom, Here is what I got:
Evaluation After Making The Blades Of Carnage
The Blades OF carnage were made in 4 hours. I was really impressed with how it turned out because I didn't do any poly modelling for a while. It was a bit hard difficult to create some edge loops in Maya. If I did some more cleanup on the topology in Maya, it would give me a nice base to sculpt on and it would be low poly enough to render with the character when animating. After making the blades I noticed that the handle wouldn't make sense but it's too cylindrical and doesn't any normal sword handle. The blade looked thicker than a traditional blade, but it did give them a more hefty and big look.
If I had more time I would've slimmed them down more and make the blade and handle thinner. I would have done more cleanup in Maya to create nicer topology to work with. I rendered this blade in the final scene and had 70k polygons, which was too many for a simple asset, but it helped keep some detail and retain the shape. Retopologizing it would've give me less polygons and I would have quicker rendering times in Arnold.
Overall, I was really happy with how the blades turned out. I love the design and the details. The only issue I have is the technical stuff could've been neater.
